


Showing posts with label DIY. Show all posts
Showing posts with label DIY. Show all posts
Visual Craft TV Ep 3: Torn Denim Shorts
Hey spring are you here yet? Well instead of waiting for you, I'm going to get a head start on my wardrobe.
I love high rise bottoms and I love torn denim shorts. Sometimes it's hard to find a good pair that fits correctly or that isn't sold out, or overpriced.
I'm going to show you how you can make your own pair of torn denim shorts so you are Coachella ready!
I'm getting a little bit better talking in front of the camera, no?

Visual Craft TV Ep1: Floral Crown
As promised I made an awkward youtube channel that is going to be filled with DIY!
Check it out and let me know what you think or want to see!

Check it out and let me know what you think or want to see!
Get ready for it...
Do you like DIY and Arts & Crafts? I love it and I've been doing DIY since I was a kid. I've always wanted to launch a youtube channel and do tutorials and videos. So I put that goal on hold and focused on other productive and not so productive things. If you follow me on instagram then you will see some of the DIY's I have done from an all black floral crown, torn denim, and even replacing the sleeves on a shirt with leather. A lot of people come up to me and ask me where I bought these things and are pretty surprised to find out that I made them.
So with that said I'm going to share my crafts with you! In the next couple of weeks I will launch my first DIY & Crafts episode on visualcraftTV!
Things you can count on seeing are floral crowns (as requested by a friend), leather sleeves, transparent clutches not in rectangular form!, and much much more!

I want to make the crafts as easy but innovative as possible. I'm really excited to start crafting with you all.

So with that said I'm going to share my crafts with you! In the next couple of weeks I will launch my first DIY & Crafts episode on visualcraftTV!
Things you can count on seeing are floral crowns (as requested by a friend), leather sleeves, transparent clutches not in rectangular form!, and much much more!
I want to make the crafts as easy but innovative as possible. I'm really excited to start crafting with you all.
A berry kale smoothie
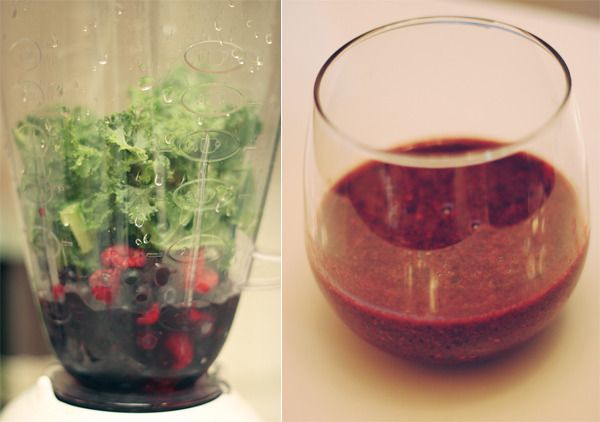
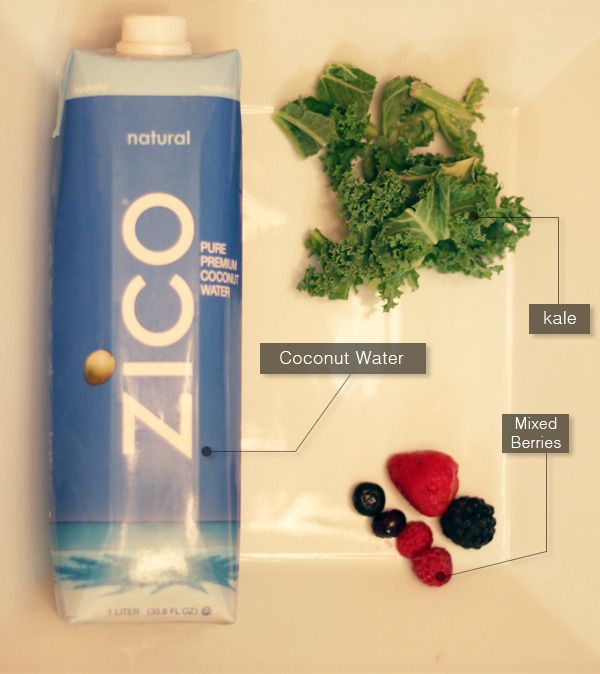
(Ingredients below if you don't want to read all of this)
I'm not too big on eating healthy and doing diets and cleanses but when everyone tells you how good juices are, you just have to go out and try them. I live right around the corner from Earthbar and I love their "earth berry" smoothie, the only problem is paying $7 everyday for something I can make right in my own home for way cheaper.
So here it is, my own juice mix. This mix is suppose to improve skin, give you a nice even glow and give your body a charge of energy.
Kale is a great source of vitamin A, C, K, Iron, and Calcium! Woah! It's also a great source of fiber and a wonderful antioxidant. It doesn't taste bad too. Fruit is also very good for your skin. You'll see a lot of products and toners that have mixed berries in them, but berries work 100 times better when inside of you and not on your face. Blueberries also carry a high source of vitamin A & C. And then there is my favorite item, coconut water. I use to drink coconut water every morning before I would go to work and although there is no evidence that coconut water improves your skin, it does help lower your blood pressure which does have an effect on your skin and health. When you mix these all together, you're making kryptonite for those toxins in your body. However something you must always remember when dealing with acne or any other skin problems is hormones. The more active your hormones get the worse your skin will get. Eating healthier and controlling the amount of junk you eat should also help improve your hormones which will help improve your skin.
Make this every morning, or night and set aside in the fridge, and drink it once or twice a day.
Are you ready?
Ingredients:
1 cup Mixed Berries (either frozen or fresh)
1 cup Kale
1 cup or more Coconut Water
Put berries, kale, and coconut water into the blender and puree until everything smooths out. Set aside in the fridge to cool down or drink right away.
This is so easy to make and it taste really good. I hope you all try it and feel the antioxidants working.
Denim DIY
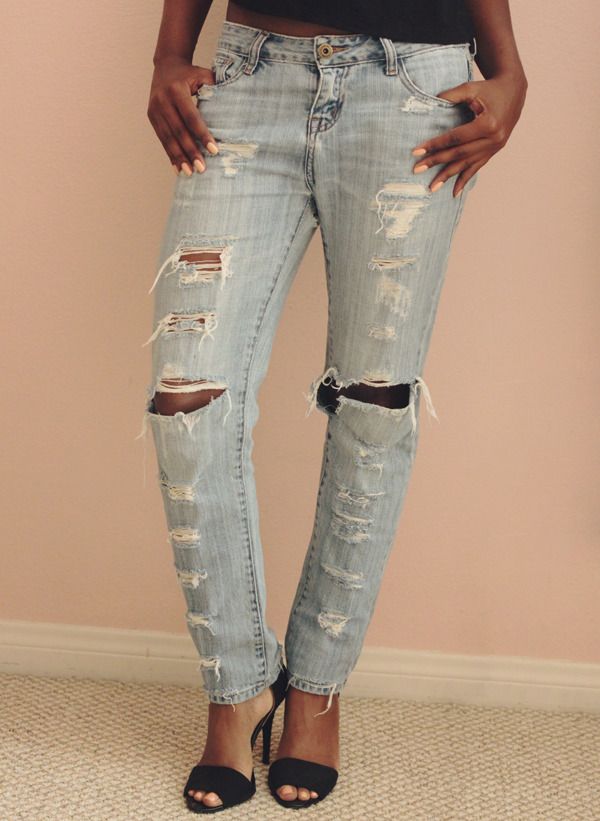
After wearing down my favorite pair of jeans to the point where my knees where completely exposed, I had the options to either throw them away, daisy duke them, or go out of control and shred them.
Obviously I went with the third option.
Free People had a lovely and effortless tutorial on how to create destroyed denim. A part of me enjoys dressing up like a 90’s grunge, I don’t give a damn, dirty artist.
These jeans have now become my go-to “lazy day” denim. Last minute trips to the market, early mornings at work (for when I roll out of bed at the last minute), and all day photo shoots give these jeans purpose. They will forever be attached to my bum.
Watch the tutorial below and create your own pair of destroyed denim


Alexander McQueen DIY Inpiration

Alexander McQueen Sweatshirt from here
I love you Alexander McQueen but $1440 is not in my budget. So if you don’t mind I’m going to take this as a DIY inspiration.
Video on this soon? Like next week-ish? I say yes.
DIY on Instagram
Sorry I’ve been bad at writing posts. I got sick over the weekend and as soon as one ailment goes away another comes in, so I’m sick again. Just my luck. Also I’m getting ready to start at a new job location!
However if you follow me on instagram then you would know that I’ve been keeping myself busy with a couple of DIY’s here and there.

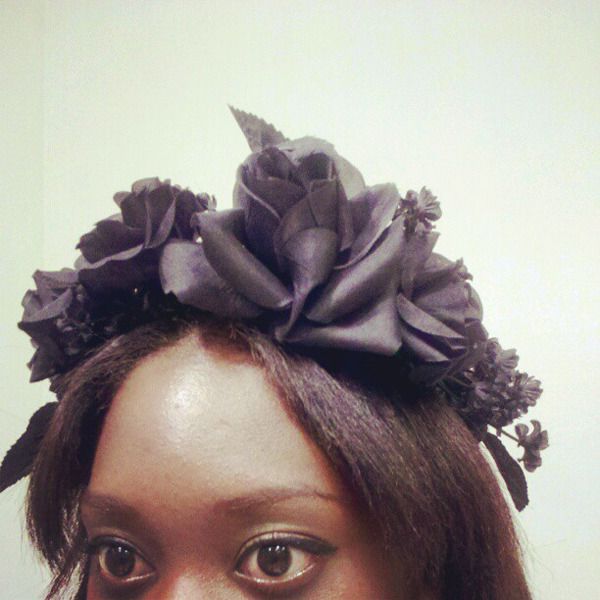
For the floral crown tutorial check it out here on kellimurray.com
(instead of thin floral wire I used a hot glue gun)
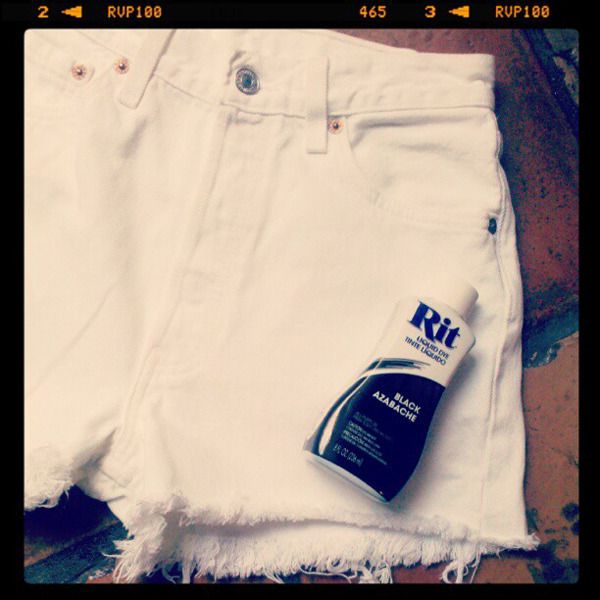

For the dip dye tutorial check it out here on Refinery 29
These shorts I got at the urban sample sale. Cut up the bottom so it will fringe when you wash them. Don’t cut them too short, unless you want them that way, just cut them enough so you can roll them a couple of times. Follow the same steps on refinery and just eyeball how far you want the darkest part to go up. And have patience. And FYI, the dye does manage to get everywhere so be careful.
That’s all, back to my ibuprofen and movies.
Follow on instagram @eboneeshanay
However if you follow me on instagram then you would know that I’ve been keeping myself busy with a couple of DIY’s here and there.
For the floral crown tutorial check it out here on kellimurray.com
(instead of thin floral wire I used a hot glue gun)
For the dip dye tutorial check it out here on Refinery 29
These shorts I got at the urban sample sale. Cut up the bottom so it will fringe when you wash them. Don’t cut them too short, unless you want them that way, just cut them enough so you can roll them a couple of times. Follow the same steps on refinery and just eyeball how far you want the darkest part to go up. And have patience. And FYI, the dye does manage to get everywhere so be careful.
That’s all, back to my ibuprofen and movies.
Follow on instagram @eboneeshanay
Beaded Collar pt.1

My current DIY project requires a lot of time, patience, and episodes of Pretty Little Liar. I'm so anxious to find out who A is and to finish this collar.
Cleaning Brushes
I will admit that I love watching michelle phan's videos on youtube and now that she's not doing that creepy/annoying voice over in every single video, it's making her more pleasing in my book.
Although her makeup tutorials do nothing for me (a little too costume-y) I still enjoy learning new things. And the most interesting and useful thing I've learned from her is how to clean your make-up brushes.
So I decided that I would give it a try. Here is my foundation brush, the dirtiest brush in the whole set.

Ewww look at how gross it is!

The olive oil and soap mix.

I just had to show what all that junk looked like.

Ta-da! The foundation brush looked brand new like the day I bought it. I love this cleaning method because sometimes I do make-up for photo shoots on other people and it takes me forever to clean my brushes. So this tutorial gets two thumbs up.
Subscribe to:
Posts (Atom)